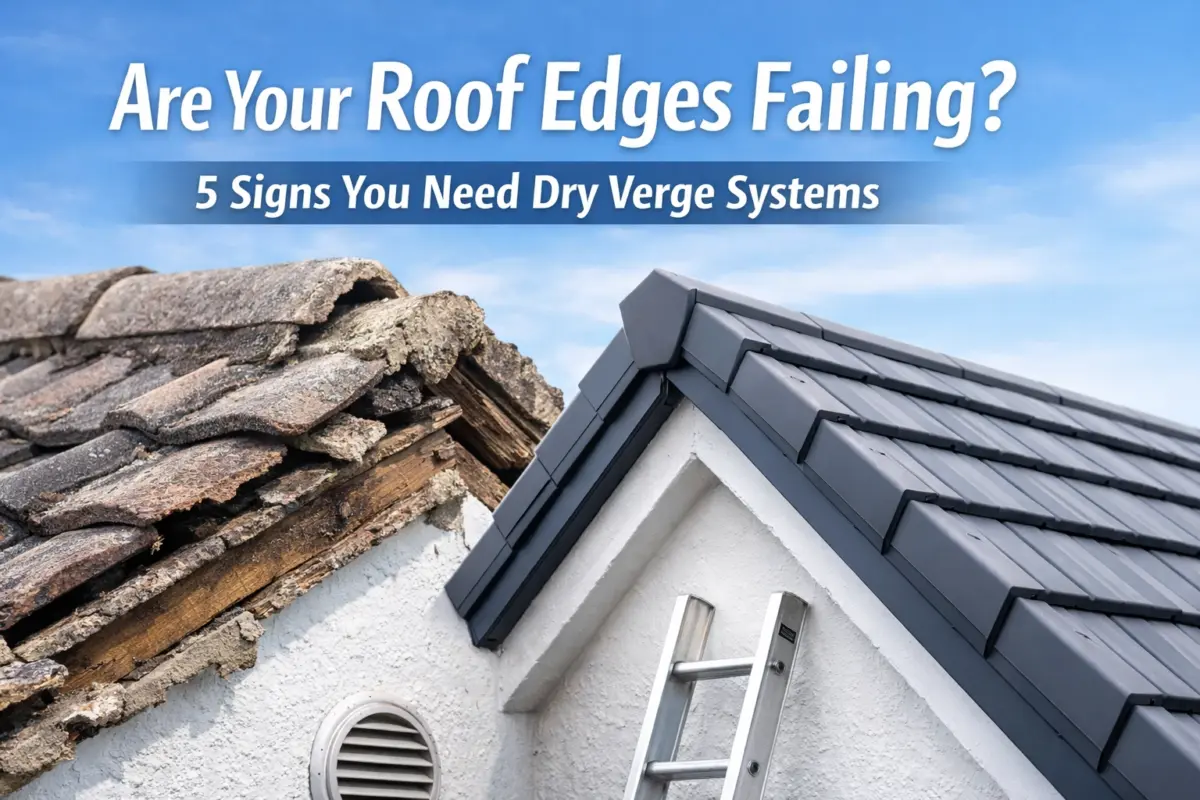
Are Your Roof Edges Failing? 5 Signs You Need Dry Verge Systems

Your roof edges are the unsung heroes of your home's weatherproofing system. They're constantly battling wind, rain, and temperature extremes to keep water out and maintain your roof's structural integrity. But here's the problem: roof edge failures account for more than half of all roofing issues, and most homeowners don't spot the warning signs until serious damage has occurred.

If you're noticing issues along your roofline, it might be time to consider dry verge systems: a modern, mechanically-fixed solution that's replacing traditional mortar bedding across the UK. Let's walk through the five critical signs that your roof edges are failing and why upgrading to a dry verge system could save you thousands in repairs.

What Are Dry Verge Systems and Why Do They Matter?

Before we dive into the warning signs, let's quickly explain what we're talking about. Traditional roof verges (the edges where your roof meets the gable end) have been sealed with mortar for decades. The problem? Mortar is rigid, it cracks over time, and it eventually fails.

Dry verge systems are mechanical capping units that clip onto the edge of your roof, creating a weatherproof seal without mortar. They're designed to flex with your roof's natural movement, provide superior wind resistance, and maintain proper ventilation. Once installed, they require virtually zero maintenance and can last the lifetime of your roof.

Now that you understand what they are, let's look at the signs that tell you it's time to upgrade.

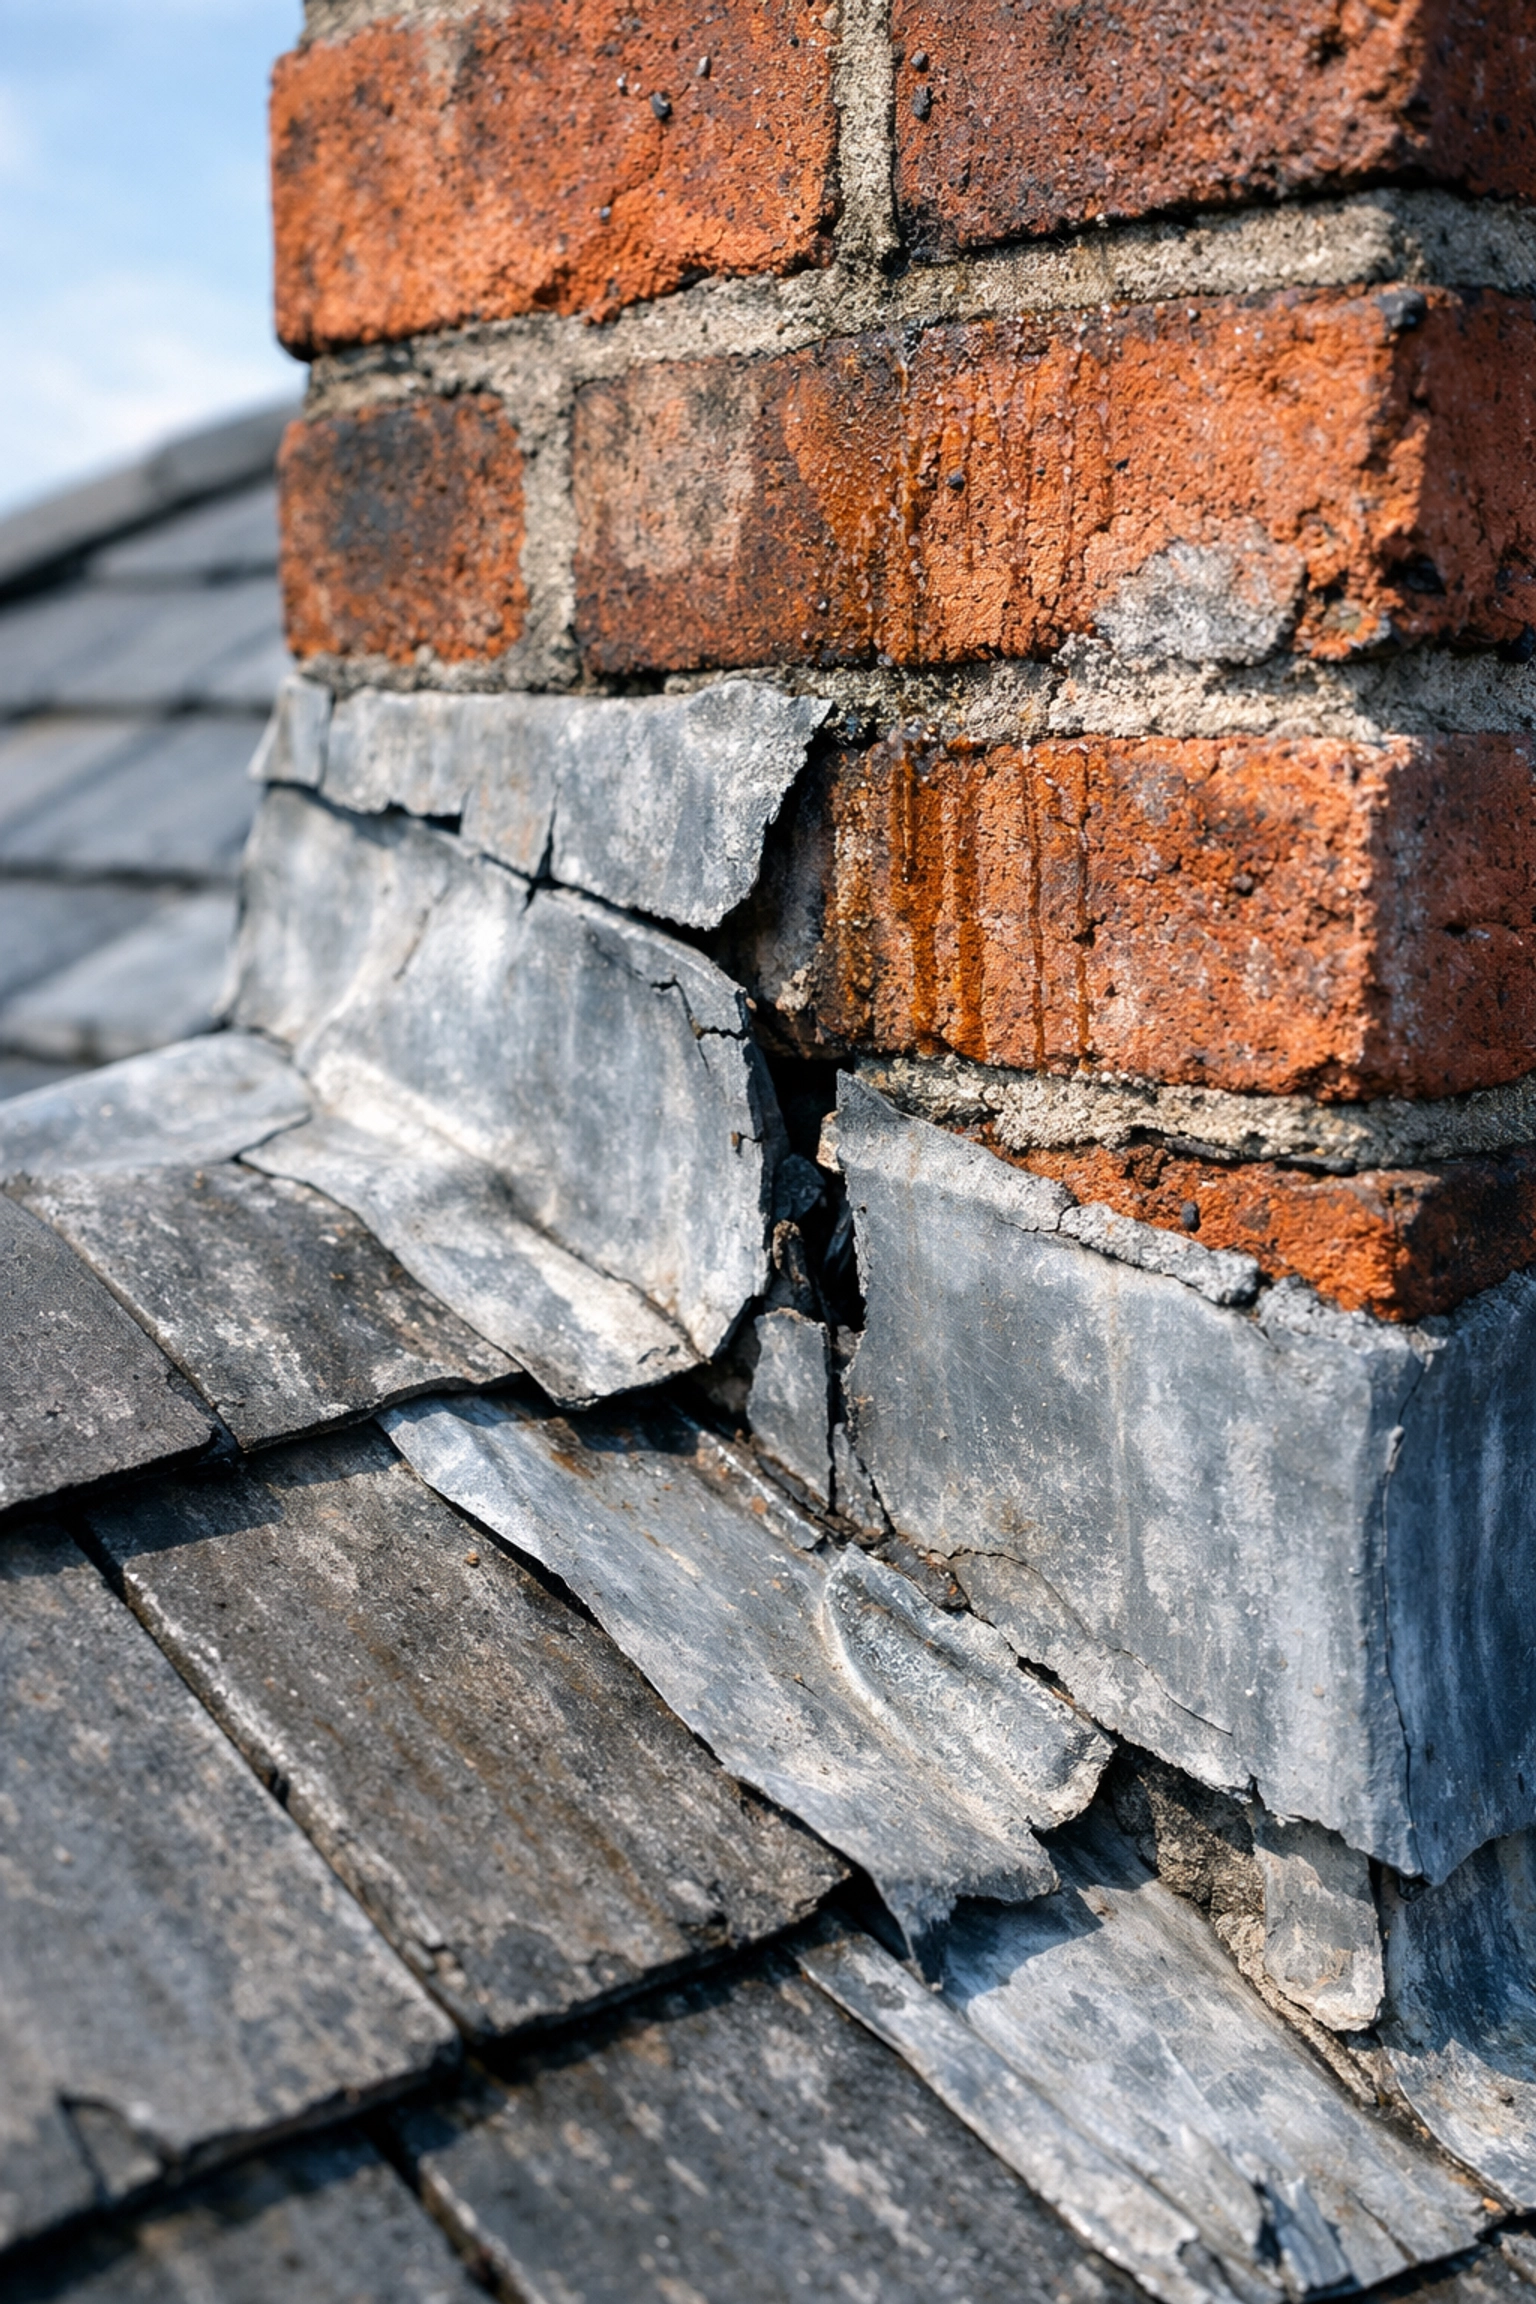
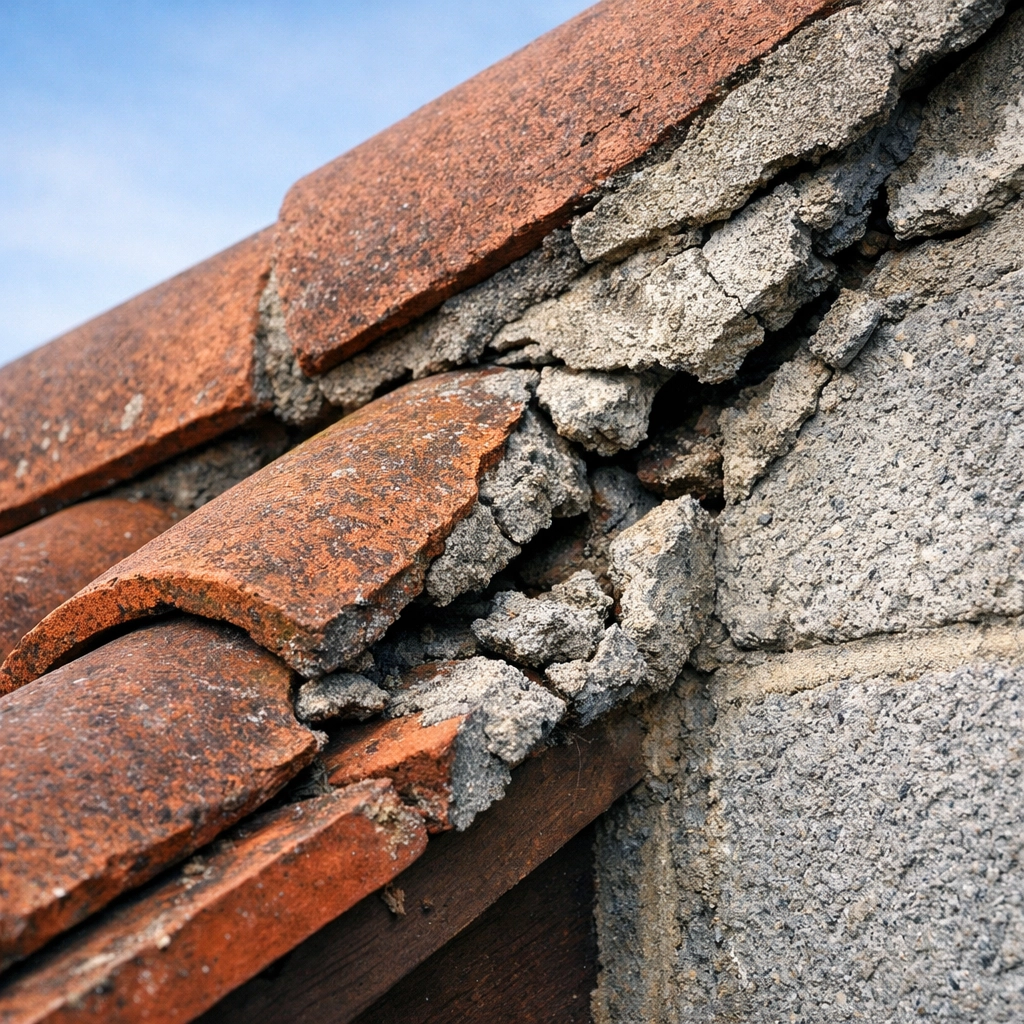
Cracked and crumbling mortar on roof verge showing signs of failure

Sign #1: Water Stains and Interior Leaks

Water damage is the earliest and most common warning sign that your roof edges are compromised. If you're seeing water stains on your ceilings or walls, especially in upper floors or along exterior walls, your verges may be allowing water infiltration.

Check for these specific indicators:

  • Brown or yellow discoloration on ceilings near external walls
  • Damp patches that appear during or after rainfall
  • Moisture buildup or mildew in your attic space
  • Peeling paint or wallpaper on walls beneath the roofline

Here's what's happening: when traditional mortar verges crack or crumble, they create gaps that allow wind-driven rain to penetrate beneath your roof tiles. This water then travels down through your roof structure, often appearing far from the actual entry point.

Don't ignore these signs. Water infiltration leads to timber rot, insulation damage, and mould growth: problems that become exponentially more expensive the longer they're left untreated.

Sign #2: Damaged, Loose, or Missing Edge Components

Take a walk around your property and look up at your roof edges. Any visible damage to the components protecting your roof edge demands immediate attention.

Watch for these red flags:

  • Cracked or crumbling mortar along the verge line
  • Loose or displaced tiles at the roof edges
  • Bent or lifted fascia boards beneath the roofline
  • Missing or damaged drip edge flashing
  • Gaps between the roof edge and the wall

Wind damage is particularly revealing. After storms or high winds, inspect your roof edges carefully. If you notice any displaced elements, it indicates that your existing edge system lacks the mechanical strength to withstand normal weather conditions.

Traditional mortar verges are especially vulnerable because they rely on adhesion alone. When that bond breaks: and it will eventually: your roof tiles lose their support system. Dry verge systems, by contrast, mechanically clip into place, providing consistent holding power regardless of weather conditions or age.

Roofer Roof Inspection in Rain A roofer conducts a detailed inspection of a leaking and damaged roof during heavy rain, identifying broken tiles, exposed timber, and visible moss. The technician is equipped with tools and assesses the extent of emergency repairs needed to prevent further water ingress.

Sign #3: Curled, Cracked, or Missing Edge Tiles

Your roof tiles at the verge should sit flat, secure, and aligned. If you're seeing curled, cracked, or completely missing tiles along your roof edges, it's a clear indication that the underlying support system has failed.

This deterioration happens because:

  • Mortar shrinks and cracks as it ages, removing support from the tile edges
  • Without proper support, tiles flex and move in the wind
  • This constant movement causes stress fractures and breakage
  • Once one tile fails, adjacent tiles become vulnerable to the same fate

When tiles break down, water seeps underneath and causes structural damage to your roof decking, timber framework, and insulation. What starts as a cosmetic issue quickly becomes a structural problem.

Dry verge systems prevent this cascade of failure by providing consistent support along the entire edge. The mechanical capping holds tiles securely while allowing for natural expansion and contraction, dramatically reducing stress on individual tiles.

Sign #4: Granule Loss Accumulating in Gutters

This one requires a closer look, but it's incredibly revealing. If you notice small black, grey, or sandy bits collecting in your gutters or downspouts, you're looking at granules washing away from your roof tiles.

Why does this matter for your roof edges?

Edge tiles experience more weathering than center tiles because they're exposed to wind-driven rain from multiple angles. When protective granules wash away:

  • UV protection decreases, accelerating tile deterioration
  • Waterproofing effectiveness drops, increasing water absorption
  • The tile substrate becomes exposed, leading to cracking and failure

Excessive granule loss along your roof edges often indicates that water is penetrating beneath the tiles due to failed verge protection. Once water gets under your tiles regularly, deterioration accelerates rapidly.

Installing a proper dry verge system stops this cycle by creating an effective barrier that prevents wind-driven rain from getting beneath your edge tiles in the first place.

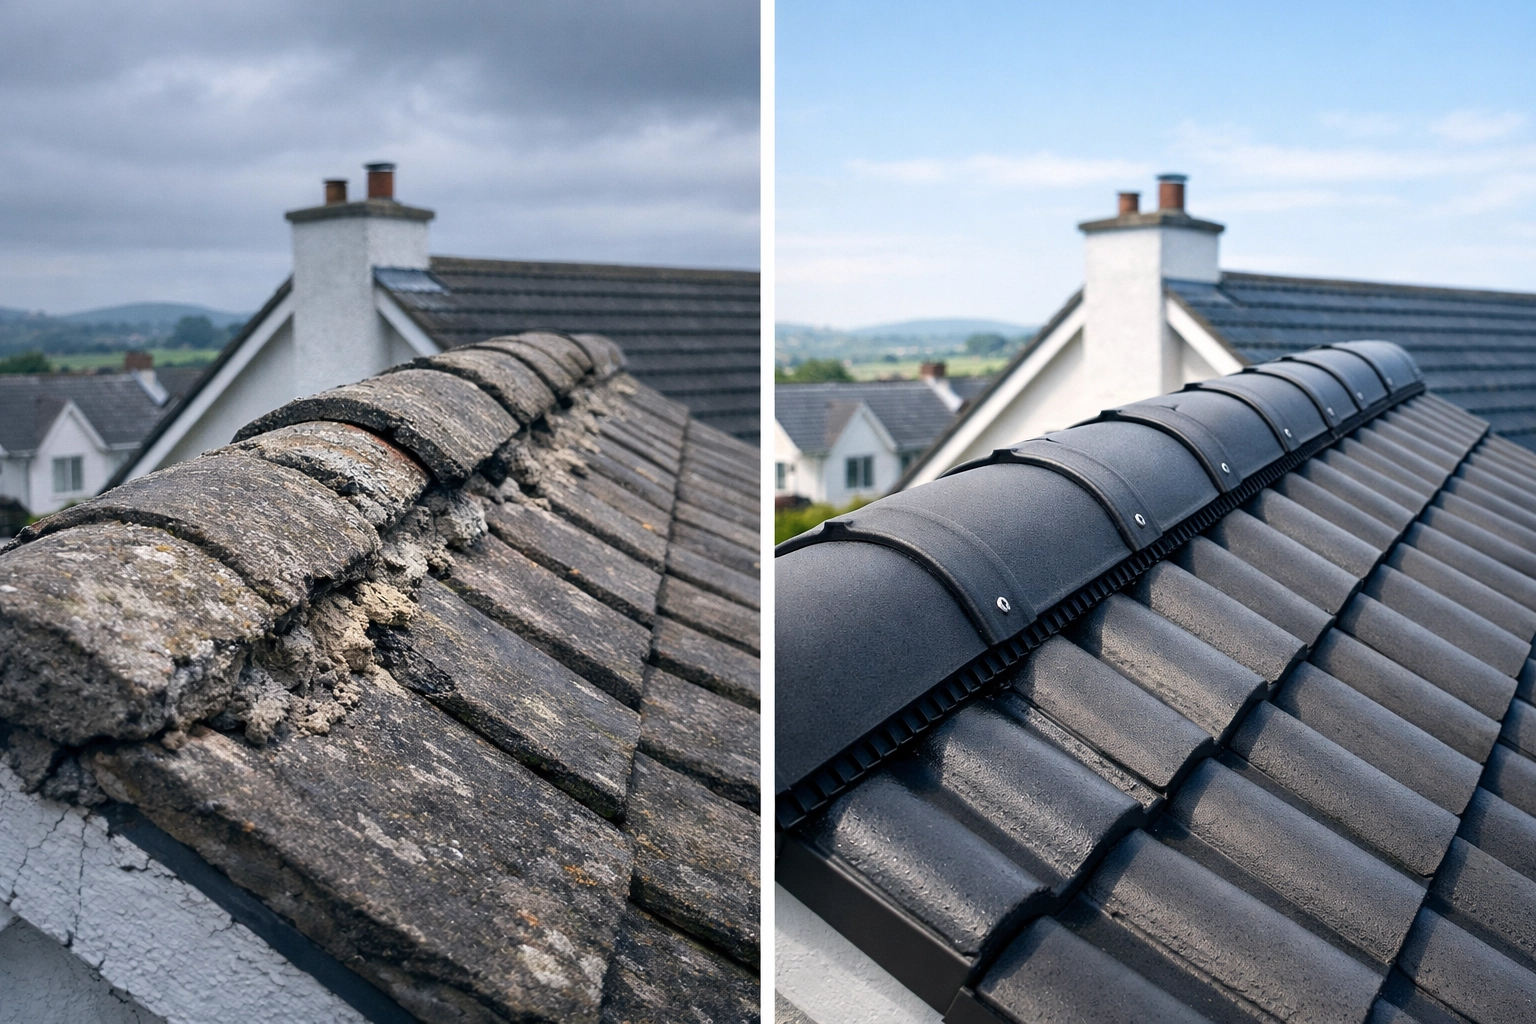
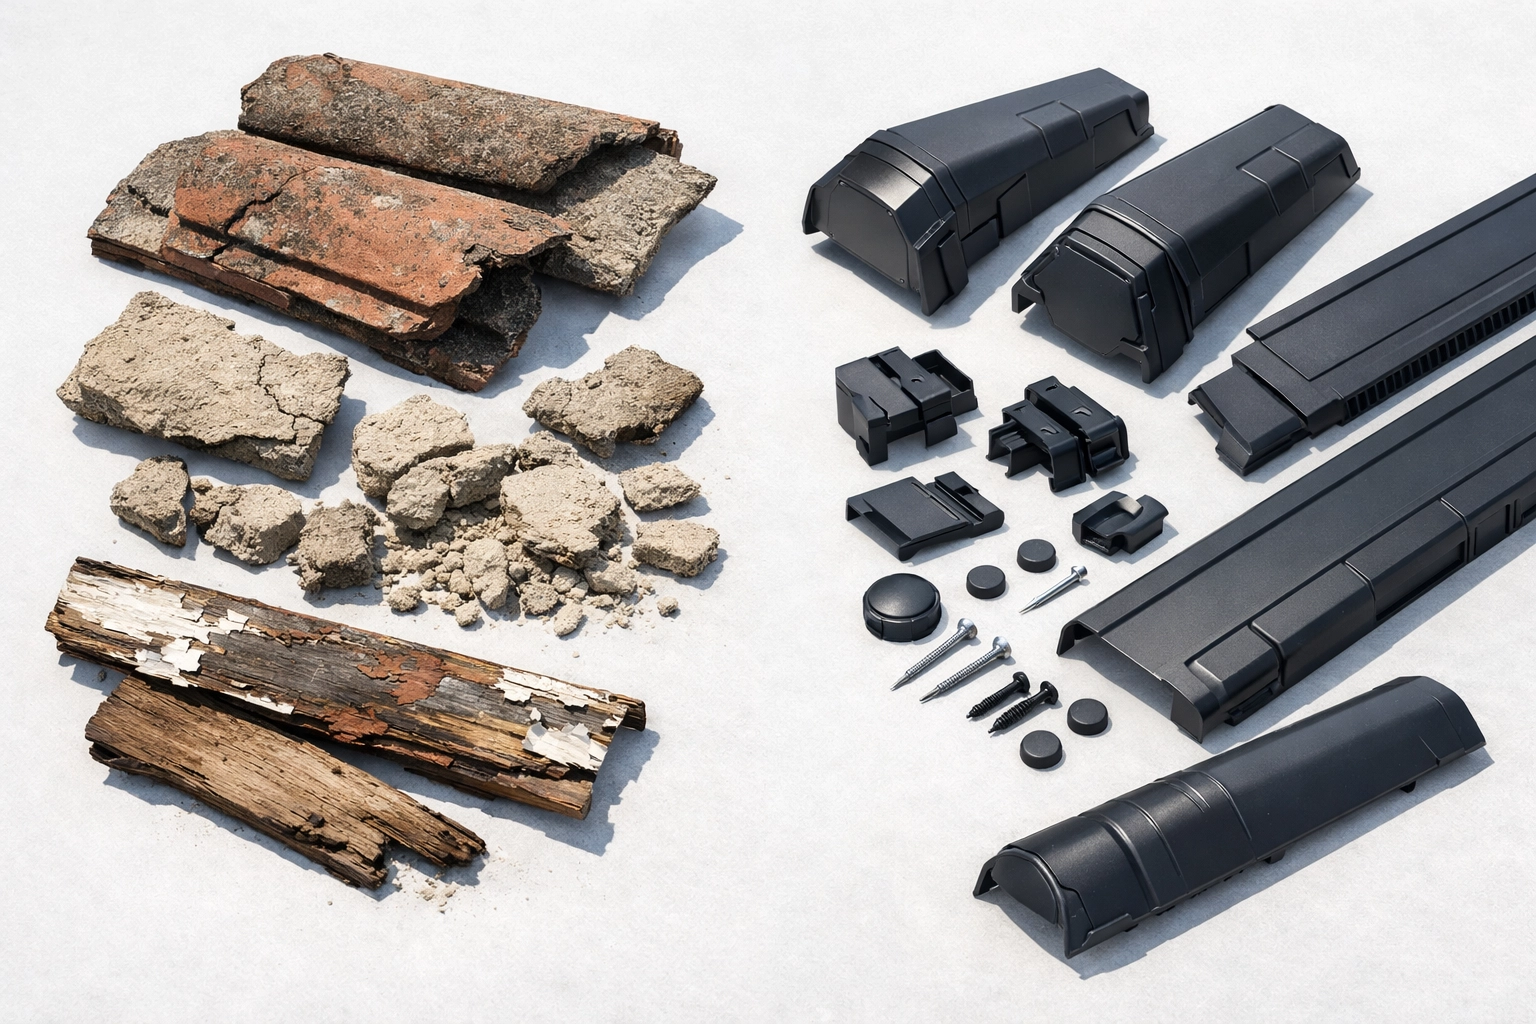
Comparison of old deteriorating mortar vs modern dry verge system components

Sign #5: Sagging or Uneven Roof Lines Along the Edges

Step back and look at your roofline from a distance. Any visible dips, sags, or uneven sections: particularly along the verges: indicate serious underlying problems.

Sagging roof edges usually signal:

  • Trapped moisture that's rotted the timber support structure
  • Failed verge support causing the edge to drop
  • Structural damage to roof battens or decking
  • Long-term water infiltration that's compromised the roof framework

This is the most serious warning sign on our list because it indicates damage beyond the surface level. When you can see structural deformation from ground level, extensive repairs are typically necessary.

The good news? Catching edge failures before they reach this stage: by addressing the earlier warning signs: can prevent this level of damage entirely. Dry verge systems provide the robust, long-term edge protection that prevents moisture infiltration and structural deterioration.

Why Dry Verge Systems Are the Solution

If you've identified one or more of these warning signs, you might be wondering why dry verge systems are the answer rather than simply repointing the mortar or making repairs to your existing setup.

The reality is that traditional mortar verges have fundamental limitations:

  • They're rigid and can't accommodate natural roof movement
  • They deteriorate over time and require regular repointing
  • They can trap moisture if not properly installed
  • They provide limited wind resistance
  • They often restrict necessary roof ventilation

Dry verge systems address every one of these issues:

Superior Wind Resistance – Mechanical fixings provide holding power that mortar simply cannot match, with systems tested to withstand wind speeds far exceeding UK weather conditions.

Built-In Ventilation – Proper dry verge systems incorporate ventilation pathways that prevent moisture buildup while keeping rain out.

No Maintenance Required – Once installed, quality dry verge systems last the lifetime of your roof without the need for repointing or repairs.

Consistent Performance – Unlike mortar that degrades, mechanical systems maintain their protective properties year after year.

Cost-Effective Long-Term – While the initial installation might cost more than mortar repointing, you'll never need to pay for verge maintenance again.

Advanced Construction & Roofing Roof Survey Service A professional roof inspector examines ceiling damage and insulation while taking notes. The image promotes Advanced Construction & Roofing's roof survey service, offering visual surveys, photo evidence, defect identification, and in-depth analysis for property owners. Contact details and a website link are included for booking a survey.

Take Action Before Small Problems Become Big Expenses

Here's the bottom line: roof edge failures don't fix themselves, and they always get worse over time. What starts as a small crack in mortar or a single loose tile can progress to water damage, structural rot, and repairs costing thousands of pounds.

The warning signs we've covered: water stains, damaged components, tile deterioration, granule loss, and sagging: are your roof's way of telling you it needs attention. The longer you wait, the more extensive (and expensive) the necessary repairs become.

At Advanced Construction & Roofing, we've helped countless homeowners across the region upgrade to modern dry verge systems, protecting their homes from edge failures and eliminating ongoing maintenance costs. Our professional installation ensures your roof edges will perform reliably for decades to come.

Don't wait for a minor issue to become a major problem. Contact our team today for a professional roof edge assessment. We'll identify any existing damage, explain your options clearly, and provide transparent pricing for dry verge installation that fits your budget.

Visit Advanced Construction & Roofing or call us now to schedule your roof inspection. Protect your home, protect your investment, and enjoy the peace of mind that comes with a properly protected roof edge system.

Condensation in Your Loft? Here’s How Roof Ventilation Can Fix It

If you've climbed into your loft and discovered damp insulation, water droplets on the roof timbers, or even mould growing on the underside of your roof, you're dealing with condensation. It's one of the most common roofing issues we encounter across Northern Ireland, and the good news? Proper roof ventilation can solve it.

At Advanced Construction & Roofing, we've seen this problem hundreds of times. The damp Northern Ireland climate creates the perfect conditions for loft condensation, but with the right ventilation strategy, you can eliminate this issue for good.

Why Northern Ireland Homes Are Particularly Vulnerable

Northern Ireland's weather isn't doing your loft any favours. Our mild, damp climate means we're dealing with moisture-laden air almost year-round. Add to that our frequent rain, high humidity levels, and relatively cool temperatures, and you've got the perfect recipe for condensation problems.

Here's what's happening: warm, moist air from your living spaces rises into the loft. When it hits the cold surfaces of your roof: the tiles, felt, and timber: it cools rapidly. That moisture in the air then condenses into water droplets, just like your bathroom mirror after a hot shower.

During winter months, the temperature difference between your heated home and the cold roof space becomes even more extreme. This is why many homeowners first notice condensation issues when the weather turns cold.

What Exactly Is Happening in Your Loft?

Condensation occurs when warm air meets cold surfaces. Your home naturally produces moisture through everyday activities: cooking, showering, drying clothes, even breathing. This moisture-laden air needs somewhere to go.

Without adequate ventilation, that damp air becomes trapped in your loft space. As it accumulates, the moisture starts condensing on cold roof timbers, felt, and tiles. Over time, this persistent dampness leads to serious problems: rotting timber, damaged insulation, mould growth, and structural issues that can cost thousands to repair.

The solution isn't complicated: you need to get that moist air out and replace it with fresh, dry air. That's where proper roof ventilation comes in.

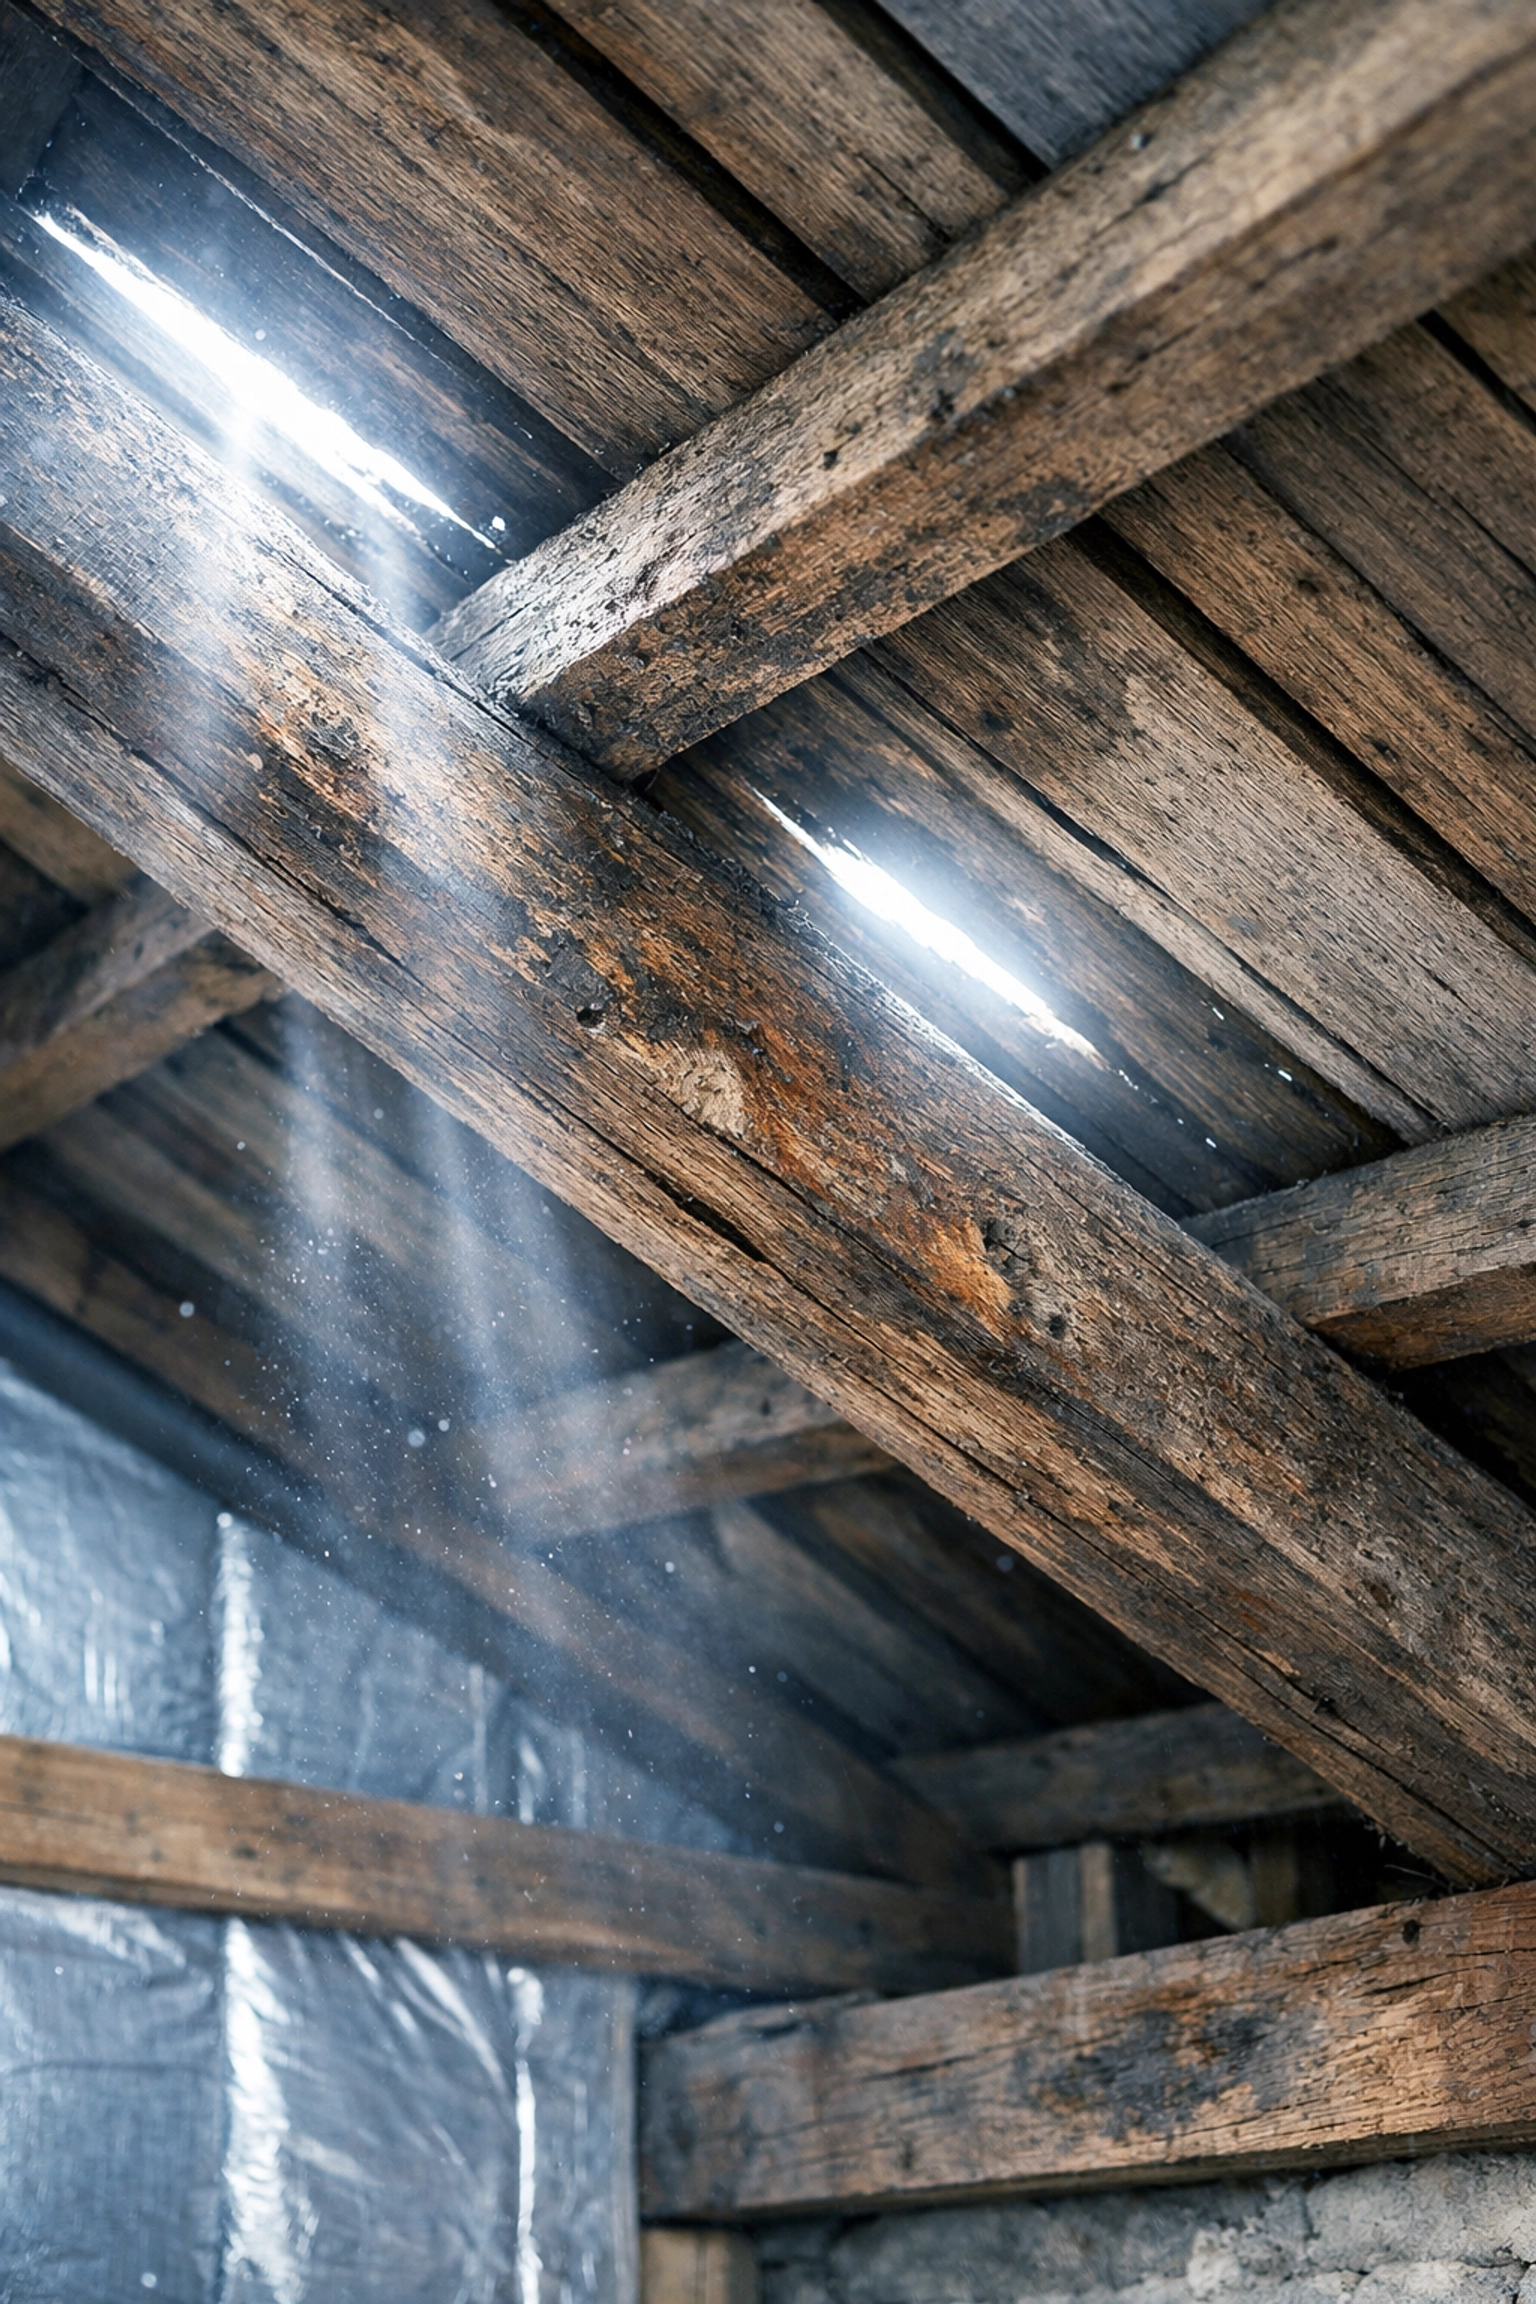
Loft condensation damage showing water droplets on roof timbers and damp insulation with mould growth

How Roof Ventilation Solves the Problem

Proper ventilation creates continuous air circulation through your loft space. This constant airflow removes moisture-laden air before condensation can form. Think of it as giving your loft the ability to breathe.

The principle is straightforward: cool, fresh air enters through vents at the eaves (the lower edges of your roof), travels up through the loft space, and exits through vents at the ridge (the roof's peak). This creates a natural circulation that keeps air moving and prevents moisture build-up.

Studies show that effective ventilation resolves approximately 99.9% of loft condensation cases to an acceptable level. It's the most reliable long-term solution available: far more effective than simply adding more insulation or trying to seal everything up tight.

Types of Ventilation Solutions That Actually Work

Different homes need different ventilation approaches. Here's what we recommend based on years of experience working across Northern Ireland:

Ridge Vents

Ridge vents sit at the very peak of your roof, allowing warm air to escape naturally. As heat rises, these vents let it exit the loft space, taking moisture with it. Modern ridge vents are discreet, weather-resistant, and highly effective. They balance overall airflow throughout the entire roof structure.

Soffit Vents

Located under your eaves, soffit vents allow cool, fresh air to enter the loft space. They work in tandem with ridge vents to establish continuous circulation. Without soffit vents, you're only solving half the problem: you need that fresh air intake to maintain proper airflow.

Tile or Felt Lap Vents

These vents integrate directly into your roof covering. They're particularly useful when you can't install adequate soffit vents or need additional ventilation in specific areas. We often add these during roof repairs or refurbishment projects.

Mechanical Ventilation Systems

For homes with serious condensation issues, mechanical systems offer a more controlled solution. Heat Recovery Ventilation (MVHR) systems continuously extract moist air while bringing in filtered, dry air. They're energy-efficient and provide consistent results regardless of weather conditions.

Roof ventilation system diagram showing airflow from soffit vents to ridge vents in loft space

Is Your Loft Ventilation Actually Working?

Many homes already have some ventilation installed, but it's not doing its job. Here's why:

Blocked Vents

Insulation commonly blocks soffit vents and eaves. During loft insulation upgrades, installers sometimes push insulation right up to the eaves, completely blocking the ventilation pathway. Check your soffit vents: can you actually see daylight through them?

Insufficient Ventilation

Building regulations specify minimum ventilation requirements, but many older homes don't meet these standards. As homes become more energy-efficient and airtight, they actually need more ventilation to manage moisture levels.

Debris and Obstruction

Bird nests, dead leaves, dust, and general debris accumulate in vents over time. This gradually reduces airflow until ventilation becomes completely ineffective.

Poorly Designed Systems

Sometimes vents are installed in the wrong locations or in insufficient quantities. Ventilation needs to be strategically placed to create proper circulation patterns throughout the entire loft space.

Can You See These Warning Signs?

Recognise any of these issues in your home?

  • Water droplets forming on roof timbers or felt
  • Damp or wet insulation
  • Black mould growing on wood or felt
  • Musty, damp smell when you open the loft hatch
  • Rotting timber in the loft space
  • Rust on metal fixings or nails
  • Ice formation on the underside of the roof in winter

These are all clear indicators that your loft ventilation isn't adequate for Northern Ireland's damp climate.

Advanced Construction & Roofing Roof Survey Service

Getting Your Ventilation Right: The Implementation Process

Fixing loft condensation through improved ventilation requires a systematic approach:

Professional Assessment

Start with a thorough inspection of your existing ventilation and loft condition. We examine airflow patterns, check for obstructions, measure current ventilation levels, and identify the extent of any condensation damage.

Calculate Ventilation Requirements

Your loft needs specific ventilation levels based on its size and your roof design. Building regulations provide minimum standards, but Northern Ireland's climate often demands more ventilation than the bare minimum.

Install Appropriate Systems

We install the right combination of ridge vents, soffit vents, and additional ventilation to create proper circulation. This might include removing obstructions from existing vents, adding new ventilation points, or upgrading to mechanical systems.

Seal Loft Hatches Properly

Your loft hatch itself can be a major source of moisture entering the loft. We ensure hatches are properly sealed and insulated to prevent warm, humid air from unnecessarily entering the loft space.

Address Existing Damage

Any timber damaged by condensation needs treatment or replacement. Wet insulation must be removed and replaced once ventilation is improved and the loft has dried out.

What About During the Winter Months?

Some homeowners worry that ventilation will make their homes cold during winter. This is a common misconception. Proper loft ventilation affects only the loft space itself: not your living areas below.

Your insulation sits on the floor of the loft, creating a thermal barrier between your warm home and the cold loft space. The loft should actually be cold: that's normal and correct. What you don't want is for it to be damp.

Ventilation keeps the loft space at the same temperature as outside, preventing that crucial temperature difference that causes condensation. Your home stays warm and dry, while your loft stays properly ventilated and condensation-free.

Blocked soffit vent filled with debris and insulation preventing proper loft ventilation

The Long-Term Benefits of Proper Roof Ventilation

Investing in proper loft ventilation delivers benefits that extend far beyond solving condensation:

Protects Your Roof Structure

Condensation leads to rotting timber, damaged felt, and structural deterioration. Proper ventilation prevents this damage, extending your roof's lifespan by decades.

Maintains Insulation Performance

Wet insulation loses much of its thermal efficiency. By keeping your loft dry, ventilation ensures your insulation continues performing as designed, keeping energy bills lower.

Prevents Health Issues

Mould growth in lofts can affect air quality throughout your home, potentially causing respiratory problems and allergic reactions. Adequate ventilation eliminates the conditions mould needs to thrive.

Increases Property Value

A well-maintained, properly ventilated roof is a significant selling point. Conversely, condensation damage raises red flags during surveys and can derail property sales.

Take Action Before the Damage Gets Worse

Condensation damage doesn't improve on its own: it only gets worse. The moisture continues accumulating, the timber keeps rotting, and the repair costs keep climbing.

At Advanced Construction & Roofing, we've helped hundreds of Northern Ireland homeowners solve their condensation problems through proper roof ventilation. Our team understands the specific challenges our damp climate creates, and we design ventilation solutions that work reliably year-round.

Request a professional loft inspection today. We'll assess your current ventilation, identify any condensation damage, and provide clear recommendations for solving the problem permanently.

Contact us at Advanced Construction & Roofing to schedule your loft inspection. Don't wait until minor condensation becomes major structural damage: get your roof ventilation sorted now and protect your home for the long term.

Your loft should be dry, your timbers should be sound, and your home should be protected from Northern Ireland's damp climate. Proper roof ventilation makes all of this possible.

Dry Ridge Vs Mortar: Which Is Better For Your Northern Ireland Roof?

Your roof ridge is more important than you think. It's the first line of defence against Northern Ireland's brutal weather, heavy rain, freezing winters, and those howling winds that seem to arrive out of nowhere. But here's the thing: the way your ridge is fixed makes all the difference between a roof that lasts decades and one that needs constant repairs.

So, dry ridge or mortar? Let's break it down and find out which system actually works for your Northern Ireland property.

What's the Difference Between Dry Ridge and Mortar Ridge?

Traditional mortar ridge systems use cement-based mortar to bed ridge tiles onto the roof. It's been the standard approach for generations, mix up some mortar, bed the tiles, and call it a day. Simple, right?

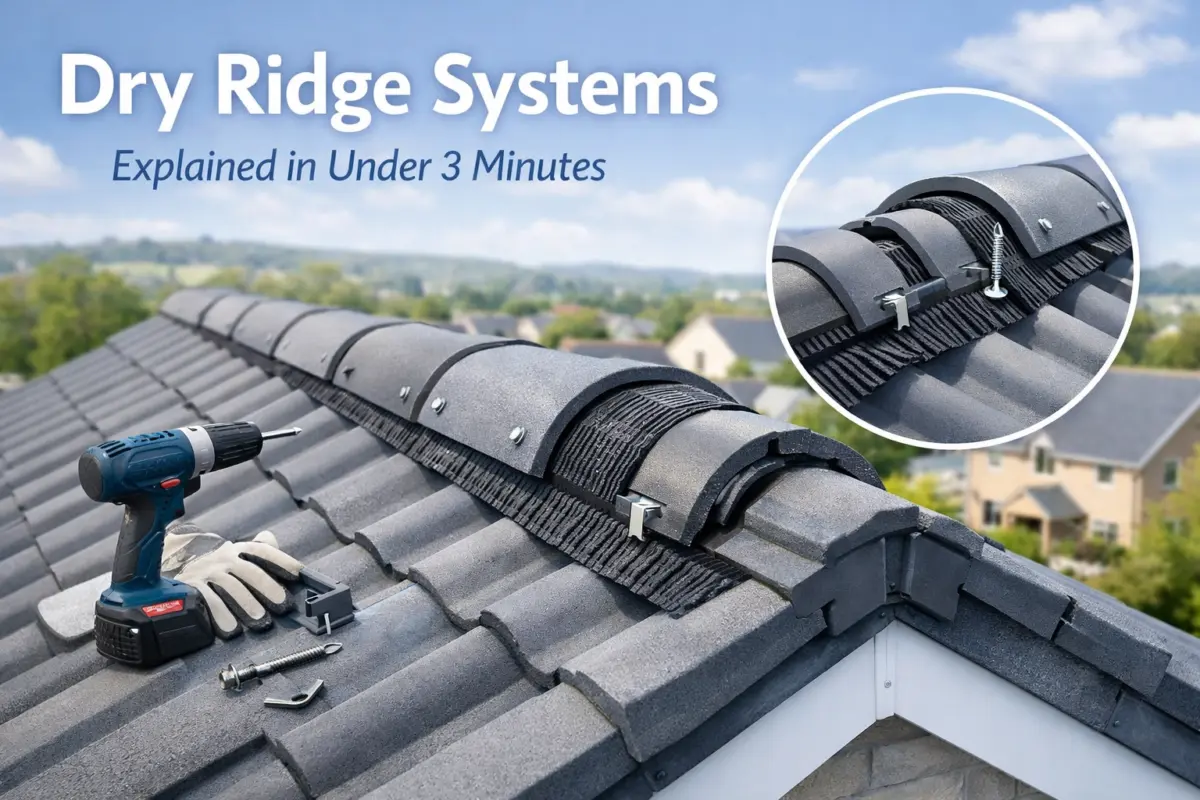
Dry ridge systems take a completely different approach. They use mechanical fixings, clips, screws, and brackets, to secure ridge tiles without any mortar at all. Each tile is individually fixed to the roof structure, creating a secure, weatherproof seal.

The key difference? One relies on cement that's exposed to the elements 24/7, while the other uses purpose-built mechanical components designed specifically for roof performance.

Comparison of crumbling mortar ridge vs new dry ridge system on Northern Ireland roof

Why Northern Ireland's Weather Destroys Mortar Ridge Systems

Let's be honest about Northern Ireland's climate, it's tough on buildings. Rain, wind, frost, and temperature swings are standard fare. And mortar ridge systems simply aren't built to handle this constant assault.

Freeze-thaw damage is the biggest culprit. Water seeps into tiny cracks in the mortar during wet weather. When temperatures drop overnight (which happens regularly here), that water freezes and expands. The mortar cracks. Then it rains again, more water gets in, and the cycle repeats. Within a few years, you're looking at crumbling mortar and loose ridge tiles.

Heavy rainfall accelerates erosion. Northern Ireland gets an average of 150+ rainy days per year in some areas. That constant exposure wears down mortar gradually but relentlessly. What starts as minor weathering becomes serious deterioration, gaps form, water penetrates, and suddenly you're dealing with damp in the loft.

Wind damage is another major concern. When mortar begins to fail, ridge tiles become loose. A strong gust during a storm can lift or dislodge tiles completely. We've seen plenty of properties where tiles have blown off during winter storms, leaving the roof structure exposed to the elements.

How Dry Ridge Systems Handle Northern Ireland's Climate

Dry ridge systems were designed specifically to solve the problems that plague mortar systems. Here's why they perform so much better in our local conditions:

Mechanical fixings don't deteriorate. Screws and clips made from stainless steel or UV-resistant materials don't crack, erode, or crumble. They're not affected by freeze-thaw cycles or heavy rain. Once installed correctly, they maintain their strength year after year.

Superior wind resistance is built into the design. Each ridge tile is individually secured to the roof structure with multiple fixings. During storms, the mechanical attachment keeps tiles firmly in place, no risk of them lifting or blowing off. This is particularly important in exposed locations across Northern Ireland where wind speeds regularly exceed 50mph.

Built-in ventilation provides an often-overlooked benefit. Dry ridge systems incorporate small gaps that allow air to circulate along the ridge line. This prevents moisture accumulation in the loft space, reducing condensation and damp issues, common problems in Northern Ireland's humid climate.

Weather seals work in conjunction with mechanical fixings to create a complete weatherproofing system. These seals flex with temperature changes and building movement, maintaining their effectiveness without cracking like mortar does.

The True Cost Comparison: Initial vs Long-Term

"But dry ridge costs more upfront." We hear this all the time. And yes, materials for dry ridge systems typically cost more initially than a bag of mortar. But that's only part of the story.

Installation labour is actually lower with dry ridge systems. A skilled roofer can install dry ridge significantly faster than bedding ridge tiles in mortar. No mixing mortar, no waiting for setting times, no weather delays because mortar can't be applied in frost or rain. Faster installation means lower labour costs.

Maintenance requirements tell the real story. Mortar ridge systems need inspection and repair every few years in Northern Ireland's climate. You're looking at:

  • Regular inspections to check for cracking
  • Repointing work to fill gaps and cracks
  • Eventual full re-bedding when mortar fails completely
  • Potential water damage repairs if problems aren't caught early

Dry ridge systems? Fit them properly once, and they require virtually no maintenance. No regular repairs, no repointing, no re-bedding. Over a 20-30 year period, the total cost of ownership is significantly lower.

Roofer installing dry ridge system with mechanical fixings on Northern Ireland home

Maintenance Reality: What You Actually Need to Do

With mortar ridge, expect to inspect annually. Look for cracks, gaps, or loose tiles. Budget for repointing work every 3-5 years in exposed locations, possibly every 5-8 years in more sheltered areas. Plan for full re-bedding work every 15-20 years, potentially sooner in harsh conditions.

With dry ridge, your maintenance is minimal. A visual inspection during regular roof maintenance is sufficient: just check that fixings remain secure and tiles haven't shifted. That's it. No repointing, no re-bedding, no regular repair costs.

The difference in maintenance hassle alone makes dry ridge worth considering, even before you factor in the cost savings.

When Should You Actually Use Mortar Ridge?

Look, dry ridge isn't always the answer for every property. There are specific situations where mortar ridge makes sense:

Conservation areas and listed buildings often require traditional building methods for visual consistency and heritage preservation. Planning regulations may mandate mortar ridge to maintain the property's historical character.

Aesthetic preferences matter too. Some property owners prefer the traditional appearance of mortar bedding, particularly on older properties where dry ridge systems might look out of place.

Very sheltered locations with minimal weather exposure might not benefit as dramatically from dry ridge systems. If your property sits in a protected hollow with limited wind exposure and you're willing to maintain mortar regularly, traditional bedding could work adequately.

That said, even in these situations, modern roofing surveys often recommend dry ridge for superior long-term performance.

Which System Should You Choose for Your Property?

Consider these factors when making your decision:

Choose dry ridge if:

  • Your property is exposed to wind and weather
  • You want minimal maintenance requirements
  • Long-term cost savings matter more than initial expense
  • You value reliability and performance over traditional appearance
  • Your roof experiences freeze-thaw conditions regularly

Consider mortar ridge if:

  • Your property is listed or in a conservation area
  • Traditional aesthetics are a priority
  • Your roof is in an extremely sheltered location
  • You're willing to commit to regular maintenance
  • Planning regulations require traditional building methods

For most Northern Ireland properties, dry ridge is the better choice. The performance benefits, reduced maintenance, and long-term cost savings outweigh the higher initial material cost.

Making the Right Decision for Your Roof

Your roof ridge protects your entire property from Northern Ireland's weather. Choose a system that's designed to handle what our climate throws at it: not one that worked decades ago before better options existed.

Request a professional assessment of your current ridge system. Look for cracks, loose tiles, or signs of water penetration. If your mortar ridge shows deterioration, don't wait for it to fail completely.

Get specific advice for your property's location and exposure. A roof in Ballycastle faces different conditions than one in Lisburn. Professional roofers understand these local variations and can recommend the right solution.

Consider the full picture: not just initial costs, but long-term performance, maintenance requirements, and total cost of ownership over decades.

At Advanced Construction & Roofing, we've installed both mortar and dry ridge systems across Northern Ireland for over two decades. We've seen which systems perform and which ones create problems. Contact us for honest advice about what works best for your specific property and circumstances.

Call us today for a roof inspection and find out which ridge system will protect your property for years to come. Your roof deserves better than constant repairs: give it the system that's actually designed for Northern Ireland's weather.

10 Reasons Your Loft Keeps Getting Damp (And How Roof Ventilation Fixes It)

You've noticed the telltale signs. Water stains on the ceiling. That musty smell when you open the loft hatch. Black mould spreading across your timber. Your loft has a damp problem, and it's not going away on its own.

Here's the truth: most loft damp isn't caused by a leaking roof. It's caused by trapped moisture that has nowhere to escape. The warm, moist air from your home rises into your loft, hits cold surfaces, and condenses. Without proper ventilation, that moisture builds up day after day, creating the perfect environment for rot, mould, and structural damage.

The good news? Roof ventilation solves this problem at the source. Let's break down exactly why your loft keeps getting damp and how proper ventilation fixes it for good.

1. Your Roof Vents Are Blocked or Obstructed

The most common cause of loft damp is blocked ventilation. Your roof should have vents at the eaves, ridge, or soffits that allow air to circulate. When these get blocked by debris, bird nests, or accumulated dust, humid air becomes trapped in your loft space.

Check your vents regularly. Clear any obstructions. If you can't remember the last time you inspected them, now's the time to do it.

2. You Don't Have Enough Ventilation in the First Place

Many older properties in Northern Ireland were built with inadequate roof ventilation. The building regulations have changed over the years, and what was acceptable in the 1970s doesn't meet modern standards.

Your loft needs continuous airflow to expel moisture. If your roof only has a few small vents, they simply can't move enough air to prevent condensation. Installing additional ridge vents, soffit vents, or tile vents creates the cross-ventilation your loft needs.

Blocked soffit vent clogged with leaves and debris preventing roof ventilation

3. Your Insulation Is Blocking Critical Airflow

You've done the right thing and insulated your loft to save on heating costs. But here's the problem: poorly installed insulation can block the very vents that prevent damp.

When insulation is pushed right up to the eaves, it blocks the airflow from soffit vents. When it covers the gaps around the edge of the loft, it stops air circulation completely. The solution isn't removing your insulation: it's installing it properly with ventilation channels that maintain airflow.

4. Household Moisture Has Nowhere to Go

Every time you cook, shower, or dry clothes indoors, you're releasing moisture into your home. That moisture rises. And without proper ventilation throughout your property, it ends up in your loft.

A family of four can produce up to 12 litres of water vapour per day. That's 12 litres trying to escape through your ceiling into an unventilated loft space. Install extractor fans in bathrooms and kitchens. Use them. And ensure your loft ventilation can handle the moisture load your household produces.

5. Your Loft Hatch Isn't Sealed Properly

Look at your loft hatch. Can you see daylight around the edges? Feel any drafts? Gaps around your loft hatch are a direct highway for warm, humid air to enter your loft.

The warm air from your heated rooms below rises through these gaps, enters the cold loft, and immediately condenses on cold surfaces. Seal your loft hatch with draught-proofing strips. Better yet, install a properly insulated loft hatch with an airtight seal.

6. Gaps Around Pipes and Water Tanks Let Moisture In

Every penetration through your ceiling is a potential moisture entry point. Pipes that go through to the loft. Water tanks with poorly sealed openings. Cable runs with gaps around them.

These aren't just minor issues: they're constant sources of moisture ingress. Seal every gap around pipes, tanks, and cables with appropriate fire-rated sealant. This simple step dramatically reduces the amount of humid air entering your loft.

7. Storage and Clutter Is Suffocating Your Loft

Using your loft for storage? You're not alone. But those boxes, suitcases, and Christmas decorations might be causing your damp problem.

Stored items block airflow, create dead air pockets, and prevent moisture from escaping. They cover vents, block air paths, and trap humid air against cold surfaces. Clear the clutter. Create clear pathways for air to circulate. If you must store items in your loft, ensure they don't obstruct ventilation routes.

Cluttered loft storage blocking ventilation and airflow causing damp problems

8. Your Boiler Is Releasing Steam Directly Into the Loft

If you have a combination boiler or condensing boiler in your loft, check its condensate pipe and flue termination. Poorly maintained boilers can release steam and condensation directly into your loft space.

This is particularly common with older boilers or those that haven't been serviced regularly. Have your boiler serviced annually. Ensure the condensate pipe drains properly and that the flue terminates outside, not into the loft.

9. External Water Ingress Is Making Condensation Worse

Here's where things get complicated. Sometimes you have both condensation and a genuine leak. Damaged roof tiles, cracked roof felt, or failing flashing can allow rainwater to enter your loft, which then mixes with condensation to create a serious damp problem.

Water stains, wet timber, and visible drips during rain are signs of external water ingress. This requires professional roof repair: condensation management alone won't fix it. If you suspect a leak, request a professional roof survey to identify the source.

10. There's Simply No Cross-Ventilation Happening

Ventilation isn't just about having vents: it's about creating airflow. Your loft needs both low-level vents (at the eaves or soffits) and high-level vents (at the ridge or gable ends) to create cross-ventilation.

Without this airflow pattern, humid air just sits in your loft with nowhere to go. The warm air rises, but it can't escape. Installing a combination of low and high-level vents creates a natural airflow that continuously expels moist air and draws in fresh, dry air.

How Proper Roof Ventilation Solves Loft Damp

Now you understand why your loft is damp. Here's how proper ventilation fixes it:

Continuous Air Movement: Functioning vents create constant airflow that removes humid air before it can condense on cold surfaces.

Temperature Regulation: Ventilation helps balance the temperature difference between your heated home and your cold loft, reducing the conditions that cause condensation.

Moisture Expulsion: High-level ridge vents allow warm, moist air to escape naturally, while low-level soffit vents draw in fresh air to replace it.

Prevention of Stagnant Air: With proper cross-ventilation, you eliminate the dead air pockets where moisture accumulates and mould thrives.

Long-Term Protection: Once installed correctly, roof ventilation works 24/7 to protect your property from damp, rot, and structural damage.

Advanced Construction & Roofing Roof Survey Service

Take Action Before the Damage Gets Worse

Loft damp doesn't improve with time. It gets worse. The longer moisture sits in your loft, the more damage it causes to your timber, insulation, and stored belongings. Mould spreads. Wood rots. Structural integrity weakens.

Request a professional inspection of your loft ventilation system. Identify exactly which of these 10 issues is affecting your property. And fix it properly the first time.

At Advanced Construction & Roofing, we've solved loft damp problems across Northern Ireland for over two decades. We assess your existing ventilation, identify the specific causes of your damp problem, and install the right ventilation solution for your property type and roof structure.

Don't wait until you're dealing with serious rot or structural damage. Contact our team today for a thorough roof ventilation assessment. We'll tell you exactly what needs fixing and how we'll fix it. No jargon. No overselling. Just honest advice from experienced professionals who understand Northern Ireland properties.

Call us now or visit our website to request your loft ventilation inspection. Your loft: and your peace of mind( will thank you.)